I wanted to share my recent experience of placing an IPO order and creating a UPI mandate using my PhonePe UPI ID. I was pleasantly surprised by how easy it was to approve the IPO mandate request on PhonePe. What impressed me the most was that, unlike other applications, I didn’t have to wait for a long time to receive the IPO mandate request.
In this guide, I will walk you through the step-by-step process of applying for an IPO, including creating a mandate and checking mandate requests on PhonePe. Read also: How to create UPI Lite Account on Phonepe and send money without UPI PIN
Create IPO Mandate using PhonePe UPI ID
To place an IPO order, you will need to use your PhonePe UPI ID and create an IPO mandate. Once the mandate is created, you will receive an IPO mandate request on PhonePe within 5-10 minutes, which you will need to approve. This approval will authorize the auto-debit of the IPO amount from your bank account when it shares allotted to you.
Let’s submit the IPO application and create a UPI Mandate using PhonePe UPI ID in 1 minute:-
(1) Log in to your Demat account, navigate to the IPO section, select your IPO, and click “Apply”.
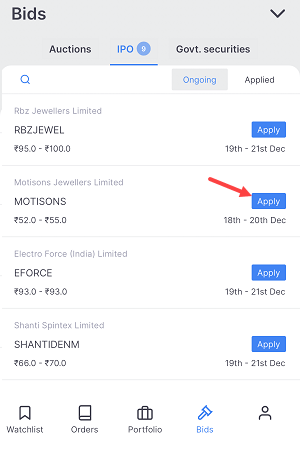
(2) Enter your PhonePe UPI ID on the IPO application screen. The system will verify your UPI ID automatically. Enter the number of lots you want to apply for and submit your application.

(3) Ok Done! The IPO application has been successfully submitted and the UPI mandate has been created. The mandate request for approval has been sent to PhonePe.
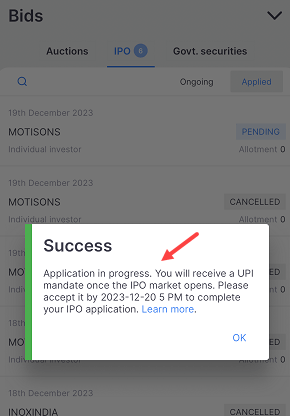
Now in the final step, we need to find the IPO mandate request on PhonePe and approve the request for auto debit.
Find and Approve IPO Mandate Request on PhonePe
We have already submitted the application for an IPO, and it is now waiting for approval of the IPO mandate. Once you approve the mandate request, your IPO application will be considered complete. After that, all you need to do is wait for the allotment of shares.
Let’s check the IPO mandate request and approve it on the PhonePe App:-
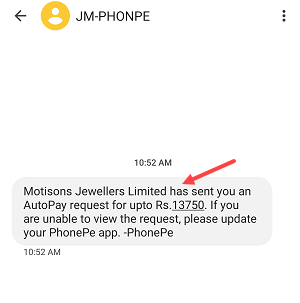
(1) When you receive an IPO mandate request on PhonePe, you will receive an SMS alert on your mobile number from PhonePe.
(2) Open the PhonePe app and log in. Once logged in, you will see the IPO mandate request mini-screen. Click “View Details” to open the request.

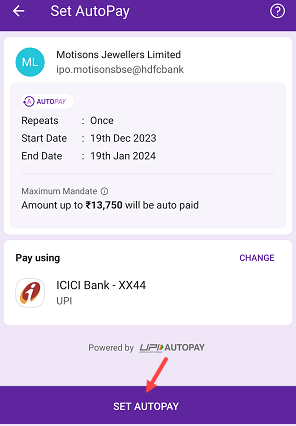
(3) On the next screen you can set AutoPay for your IPO mandate and complete the approval process. (Setting up AutoPay means authorizing the automatic debit of the IPO allotment amount from your bank account.)
If you have closed the IPO mandate request screen mistakenly then not to worry you can still find the mandate request on the App.
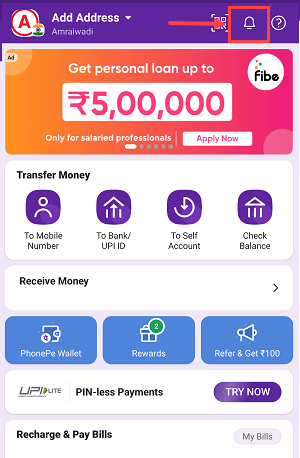
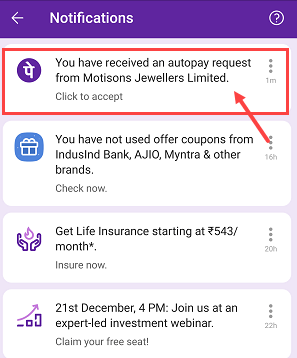
(4) Open the Notification section by tapping on the Ring (bell) icon.
(5) You will find your mandate request now, click to open.
(6) Now complete the approval step by tapping on the “Pay” button.
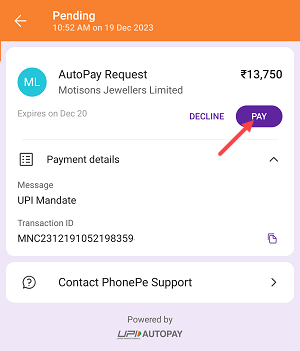
Once you approve the UPI Mandate on PhonePe for IPO investment, the amount you have invested in the IPO will be temporarily blocked in your bank account until the IPO allotment announcement. In case you are allotted shares, the blocked money will be debited from your account.
However, if you are not allotted any shares, the blocked amount will be unblocked and returned to your account within a span of 8-10 days.