Search Engine giant – Google launches its Digital Payment UPI Application – Google Pay (Gpay) this week in India. Today we will learn about it.
Last year, NPCI (National Payment Corporation of India) had launched its own Digital Payment UPI Application – BHIM and then as you all know, all the major banks have launched their own UPI application.
Google Pay is just released and plenty of new features yet to come. It is certain that Google Tez is going to give a big competition to other digital payments application like Phone pe, Paytm, pockets.
Ok, so let’s see how to register on Google Pay, How to add bank account and how to use it?
Google Pay Highlights
Google Pay is also like all other UPI applications but it is Google developed so we expect much more from it. In latest release here are some highlights:
- Google Pay supports all major banks
- You can Add multiple bank account
- money transfer facility through UPI address, Mobile number, Bank account
- With Cash Mode feature, you can send money to Pay user instantly
- Pay Shield Security Feature keeps you safe
- Multiple Language Support
So let’s learn how to use Google Pay, how to add a bank account and how to transfer money.
Google Pay – How to Use
GPay is now available for Android and iOS, you can install from Playstore / iOS store in your phone.
1 # Registration Process
First of all let me tell you like all UPI application, in your phone you must insert your SIM number that is Registered with your Bank account. Google Pay will automatically detect your bank account which linked with your account.
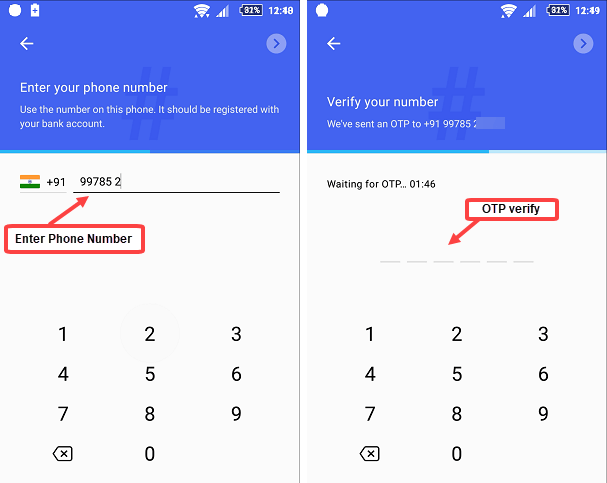
1 Open Google Tez and start the registration process
- On the first screen, you have to type your mobile number. Here you have to type your registered mobile number with your bank account.
- After typing the mobile number, enter the OTP on the next screen which will be sent to your mobile number via SMS, OTP will be automatically detected so you don’t need to type.
2 Now on the next screen you will be given 2 options to set up the login password. You can set a 4-digit Google PIN here, or you can also set your Phone Screen Lock Password, PIN, Pattern Lock.
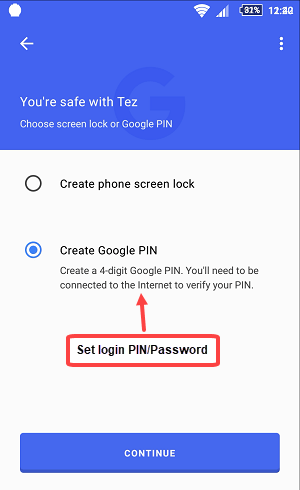
If you want to use a phone screen lock, you have to first enable that on your phone.
After setup a login PIN / password, you are now registered with Google Pay and next we will add bank account.
2 # Add Bank Account
After registering, now you have to add your Bank Account to Google Pay. You can add single or multiple bank account in Google Pay. All major banks support UPI payment.
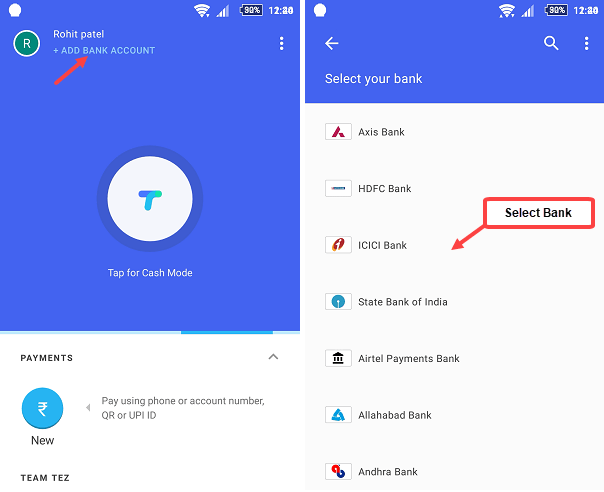
1 To add a Bank Account, you need to click Add Bank Account.
- In the next screen you can see the list of all supporting banks. Click on your bank where you hold an account.
2 Once you click on the bank, if you are asked to send an SMS, then you have to send an SMS for verification. After verification, you can see your bank account then Click Proceed.
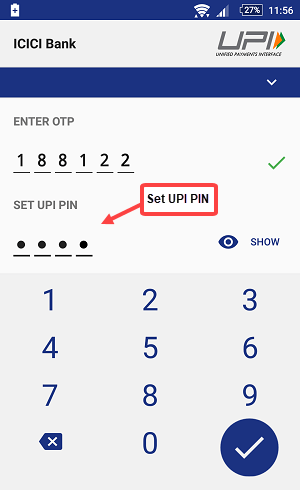
- In the next screen, you have to create UPI PIN. The UPI PIN is used for authentication. You can not do any transaction without it. For any transaction, you will be asked to enter UPI PIN.
- To create UPI PIN, type the last 6 digit number and expiry date of your ATM Card and proceed.
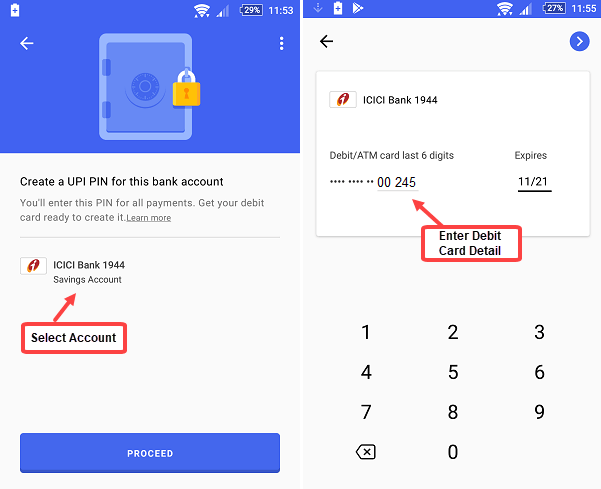
3 In the next screen you have to set your UPI PIN. Set the 4-6 digit UPI PIN.
Done! you have successfully added your bank account in Google Pay. Now you are ready to send money.
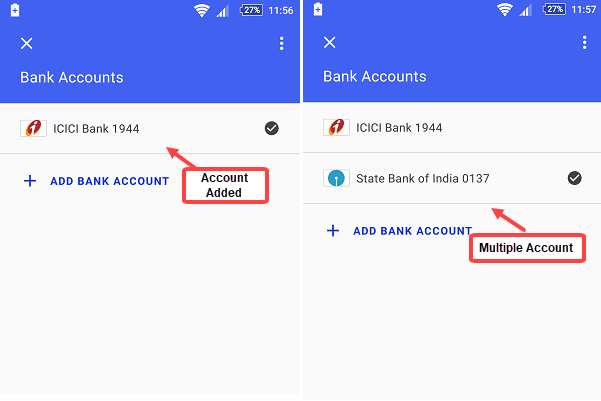
By Following same process you can also add multiple bank accounts, if you have.
3 # Send Money
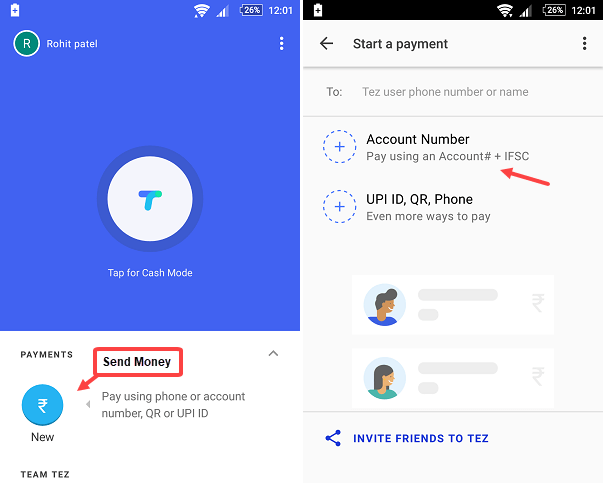
Through Google Pay, you can send Money to any bank account using account number & IFSC, UPI ID, Mobile number and Pay user.
- To send Money, click on the Rupees symbol (pay using Phone or account number, QR or UPI ID) at home screen.
- In the next screen, you can see the Account Number option, using this option you can send money to the person by entering his/her Account number and IFSC code.
You can also send money with UPI ID. For this, you just have to enter the person’s UPI ID.
You can also send money to any Google Pay user by entering his/her mobile number.
4 # Google Pay cash Mode Feature
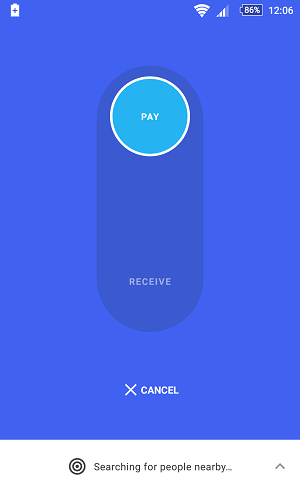
This is a fairly good feature of Google Pay where you can send money to GPay user who is near you. The money will be sent within seconds without entering any details.
To use Cash Mode, click on Tap for Cash mode at the home screen.
Now select Pay option if you are paying or select receive if you are receiving money.
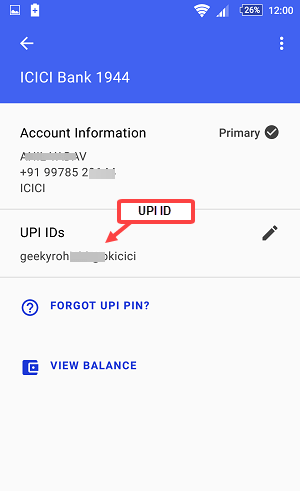
5 # Check your UPI ID
If someone want to send money to you then you can give your UPI ID. Using UPI ID the person can send money directly in your bank account which linked with your ID.
To see your UPI ID on Google GPay you have to open Setting.
Next you can see your UPI ID.
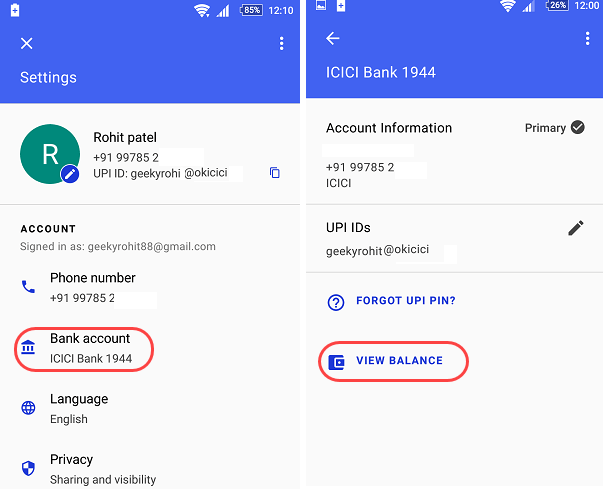
6 # Check Bank Account Balance
You can also check your account balance in Google Pay.
- To see your Account Balance, go to Settings
- Click Bank Account
- Click on your bank account
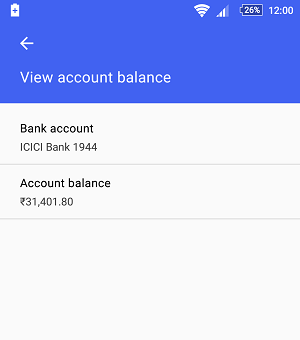
- Click Check balance on the next screen and type your UPI PIN.
You can see your available balance now.
Final Words
So this how you can use Google Pay UPI based application for digital payments. Google is working to add more new features like Pay bills, Recharges and more so let’s see how Google Tez compete with other digital payment competitors.